Last updated · Written and tested by The PixelArtFromPhoto team, who build and maintain this tool.
This Minecraft pixel art generator shrinks your picture onto a grid of blocks and matches each one to a buildable block colour. It counts every block, so you know how many stacks to collect before you start, and the grid shows exactly where each block goes.
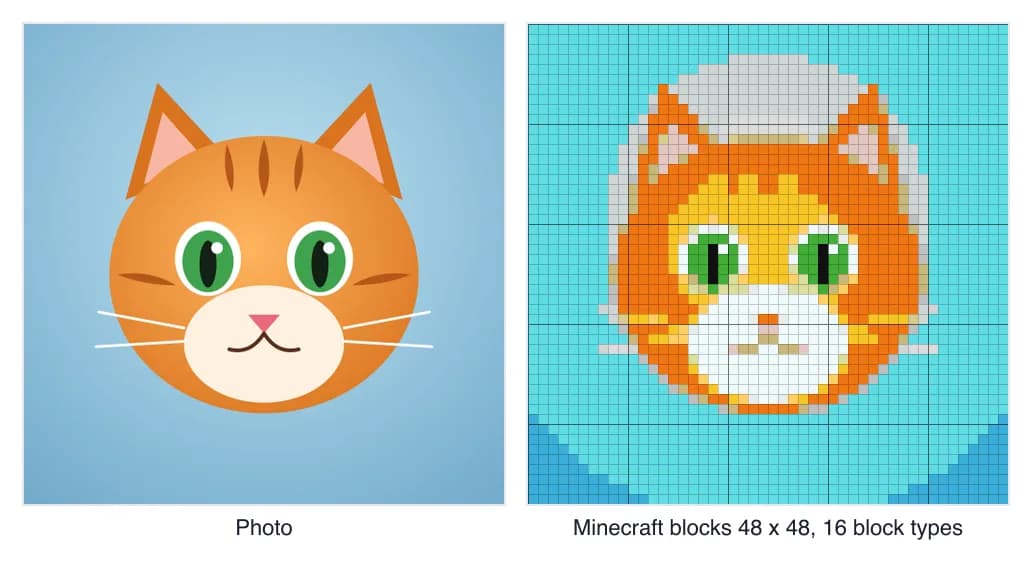
How to build pixel art in Minecraft
- Choose a simple picture. Game characters, logos and emojis work far better than detailed photos.
- Set the width in blocks. Start around 32 to 48. Every doubling of the width means four times as many blocks.
- Limit block types. Fewer types mean fewer trips to gather materials.
- Check the block list and gather the materials. Divide each count by 64 to get stacks.
- Build from the bottom row up, row by row, following the grid. A wall works well for portraits; a floor works for very large builds.
Planning materials
| Build size | Blocks | Stacks of 64 |
|---|---|---|
| 16 x 16 | 256 | 4 |
| 32 x 32 | 1,024 | 16 |
| 48 x 48 | 2,304 | 36 |
| 64 x 64 | 4,096 | 64 |
| 128 x 128 | 16,384 | 256 |
A full shulker box holds 27 stacks, which is 1,728 blocks, so a 64 x 64 build fits in about 2.4 shulker boxes.
Tips for better Minecraft pixel art
- Turn dithering off. Scattered single blocks look noisy in game and are slow to place.
- Use an outline. Dark edge lines make characters pop from a distance.
- Mind the lighting. Builds look darker at night and in shade; torches or glowstone behind the wall help.
- Test a small version first at 16 or 24 blocks wide to check the colours in your world.
Want the same picture as classic pixel art, beads or cross stitch? Use the photo to pixel art converter or the Perler bead pattern maker.
Minecraft is a trademark of Mojang Synergies AB. This tool is not affiliated with or endorsed by Mojang or Microsoft.
Minecraft pixel art FAQ
How do I make Minecraft pixel art from a picture?
Add the picture to the generator above. It maps every pixel to a Minecraft block such as wool, wood or stone and lists how many of each you need. Choose the width in blocks and the number of block types, then follow the grid in game.
What size should Minecraft pixel art be?
32 to 64 blocks wide is a good start for a character or logo. A 64 x 64 build is 4,096 blocks. For huge builds, plan in chunks: the PDF draws bold lines every 16 blocks so you can match them to chunk borders.
Which blocks are used?
53 blocks: all 16 wool colours, 10 kinds of wood, black and white concrete, and natural blocks such as stone, sandstone, clay, deepslate and grass. Seven of them are mineral blocks (iron, gold, diamond, emerald, lapis, redstone and glowstone) that are costly in survival, so check the block list before you commit.
Are the block colours exact?
No. Each block is represented by one average colour, and textures, lighting and shaders change how it looks in game. Check a block in your world before you collect hundreds of it.
Is this the same as map art?
Not quite. Map art uses the colours a block shows on an in-game map, which can differ from how the block looks when you build a wall. This generator is made for builds you look at directly, such as walls and floors.
Is it free?
Yes, generating the build plan, the block list and the grid image is free. Pro adds a printable PDF split into 48 x 48 block pages with chunk lines, plus larger exports.